In this article we will go though Mockoon, understand its features how to setup and how to use on your Development stage
Intro#
Mockoon is a free cross-platform desktop application that takes API mocking to the next level. Mockoon offers a fast and easy-to-use interface and gives you complete control over your mock APIs with advanced functionality like a templating system, a proxy mode, and request recording.
Install#
I will be using the Arch distribution package
pacman -S mockoon-bin
If you start the mockoon application you will get something like this
Create Environment#
Lets start by creating a new Local Environment and select a json datafile to store the data.
Note: You can synchronize your setup in Mockoon Cloud and collaborate with other coworkers by subscribing the service.
When you create a new environment a default /GET endpoint is create, if you push Start Server if will be available.
Create New Endpoint#
Create a new HTTP Endpoint with the path /users and set the following body
// Sample body
[
  {{#repeat 10}}
    {
      "id": "{{faker 'string.uuid'}}",
      "name": "{{faker 'person.firstName'}} {{faker 'person.lastName'}}",
      "email": "{{faker 'internet.email'}}",
      "phone": "{{faker 'phone.number'}}",
      "address": "{{faker 'location.streetAddress'}}, {{faker 'location.city'}}, {{faker 'location.state' abbreviated=true}} {{faker 'location.zipCode'}}",
      "birthdate": "{{faker 'date.past'}}",
      "isActive": {{faker 'datatype.boolean'}}
    }
  {{/repeat}}
]
And finally lets add a Header Content-Type with application/json so that the client understand the response format.
If you start the server now and access the endpoint you will check some interesting Mockdata available.
Add delay to response#
Now lets add delay to response to simulate a real-world scenario where the server takes some time to process the request. (This is useful for testing client’s behavior when the server is slow to respond)
- Lets include 2000 milliseconds (2 seconds) on the response
Settings#
- If you choose Settings you can change the default port of the Environment, TLS configuration and Latency
Logs#
- The Logs section allow you to check all the
requestsandresponsesfor this tool
CORS#
- You can add CORS headers to the environment like the following example
Access-Control-Allow-Origin: *
Access-Control-Allow-Methods: GET,POST,PUT,PATCH,DELETE,HEAD,OPTIONS
Access-Control-Allow-Headers: Content-Type, Origin, Accept,Authorization,Content-Length, X-Requested-With
Request body formats#
Mockoon supports the following request body formats
application/jsonapplication/x-www-form-urlencodedmultipart/form-dataapplication/xml
Example json body helper
{{body 'key'}}
<!-- object-path syntax -->
{{body 'nested.key'}}
<!-- JSONPath syntax -->
{{body '$.nested.key'}}
Import/export in OpenAPI format#
- Mockoon supports imports in both OpenAPI v2 (Swagger) and v3 formats. Environments can be exported to OpenAPI version 3 as JSON file.
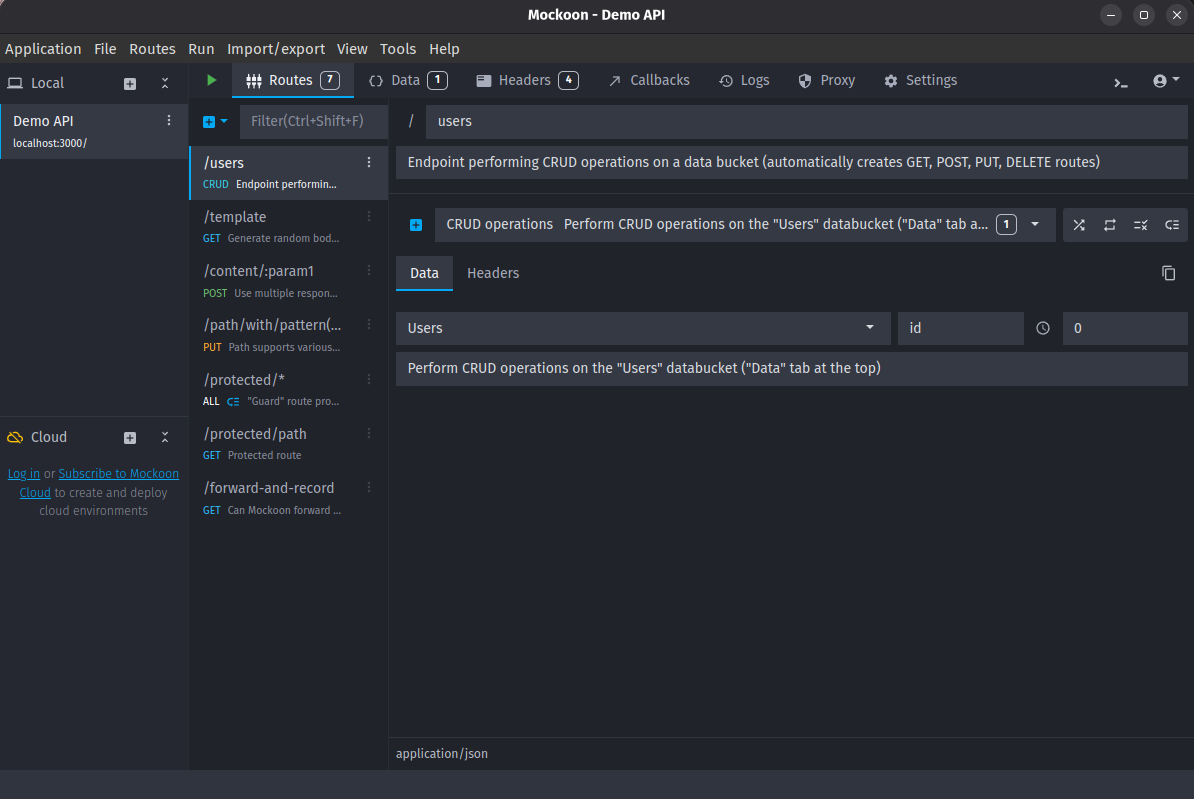
CRUD - Data bucket link#
- After creating a CRUD endpoint, you need to link it to a data bucket. A data bucket is a key value store where you can create reusable content or data for your routes.
- The data buckets are defined at the environment level and are generated when the server starts. It means that their state persists between each call
Create a data bucket#
- To create a new data bucket, open the Data options by clicking on the tab at the top of the window and add a new data bucket by clicking on the “plus” button:
Mock sample#
- If you would like to test some existing API, you could double-check the mock-samples to understand if there is one available already.
JWT Helper#
- Mockoon templating system includes various helpers to help you create dynamic responses. This page lists the helpers related to JWT tokens.
Mockoon Serverless#
- Mockoon’s Serverless package provides an easy way to run Mockoon’s mock APIs in cloud functions and serverless environments: AWS Lambda, GCP Functions, Firebase Functions, etc
Serverless Installation#
npm install @mockoon/serverless
Firebase Example#
To use Mockoon Serverless in a Firebase Function, you can use the following code
const { onRequest } = require('firebase-functions/v2/https');
const mockoon = require('@mockoon/serverless');

// Load the Mockoon Environment object
const mockEnv = require('./datafile.json');

const app = new mockoon.MockoonServerless(mockEnv).firebaseApp();

exports.app = onRequest(app);
Conclusion#
In this article, we explored the basic functionality of Mockoon and demonstrated how mocking APIs with Mockoon can accelerate application development, integration, testing, and demos. By providing a stable and consistent environment, Mockoon significantly enhances the developer onboarding process, speeds up the development lifecycle, and reduces dependencies between frontend and backend teams.
With API mocking, you can start working with third-party APIs almost immediately, without needing to register for an account. It also offers the flexibility required to run complex integration tests for interconnected systems, microservices, or third-party API integrations.
This article only scratched the surface of this tool’s potential, but I highly recommend it to any backend or frontend developer.