26 Sep, 2017 - About 5 minutes
Quick Guide for Vagrant and Libvirt
Intro
This article is going to be about a quick way to setup a PoC environment using libvirt (QEMU) and vagrant, and auto configure the environment using ansible.
Why
One might go a bit further in the testing environments, instead of dockers using virtualized environment. This kind of approcah would be suitable when you like to try infrastructure services, or simple don’t want to use dockers.
If you check Internet Trends we can see docker interest have grown quite a lot on the last 5 years.
Still i’m OldSchool and i like my plain-simple-VMs some times :D
A later article would be about configuring a Mesos Cluster so this one makes sense as a preparation guide for it.
Requirements
- Make sure you have vagrant installed
- Make sure your machine supports virtualization :)
- Make sure you have QEMU installed
- Make sure you have libvirt up and running
- Make sure you have ansible (Optional)
Note: This guide was tested on Ubuntu 16. Use at your own risk
One can test libvirt version suing the command
$ virsh version |
NOTE: Before you start using Vagrant-libvirt, please make sure your libvirt and qemu installation is working correctly and you are able to create qemu or kvm type virtual machines with virsh or virt-manager.
setup
Install dependencies
sudo apt-get install qemu libvirt-bin ebtables dnsmasq |
Install vagrant-libvirt plugin:
vagrant plugin install vagrant-libvirt |
Now let’s test by creating a startup Box. There are several available here
Example: (Ubuntu 16)
mkdir Vagrant |
Let’s start the VM
vagrant up --provider=libvirt |
After executing the command you should have some output similar
==> default: Successfully added box 'marczis/ubuntu_16_04' (v0.1.2) for 'libvirt'! |
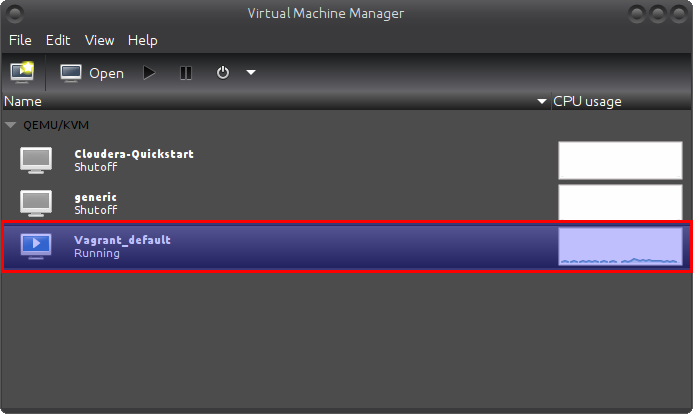
If you execute virt-manager you can see the virtual machine specification and adapt the Vagrant file to you needs.

You can then ssh to the VM using the command vagrant ssh. You should have a prompt like:
Welcome to Ubuntu 16.04.2 LTS (GNU/Linux 4.4.0-77-generic x86_64) |
You can add the ssh key to your ssh configuration executing the following command. ( Check my previous [article] regarding this topic)
vagrant ssh-config >> ~/.ssh/config |
then try the command ssh default . Default if the default name of the VM defined in the vagrant file.
Let’s extend a bit
The next step is to set Ansible as our provisioning provider for the Vagrant Box. Add the following lines before the end statement in your Vagrantfile to set Ansible as the provisioning provider:
config.vm.provision :ansible do |ansible| |
Let’s create the playbook.yml file with the following content
|
This example playbook will install apache service on the all hosts given by Vagrantfile and start the service.
Then we can run the command to just run the provision stuff
vagrant provision |
Let’s add the following configuration on our Vagrant file
config.vm.network "forwarded_port", guest: 80, host: 8080 |
And execute vagrant reload
If one access http://localhost:8080 we are now accessing the VM installed service.
If you recreate the VM it would run the ansible part at the end.
So it’s quite easy to recreate your environment.
Cluster Configuration
One could have Vagrant more complex configuration like the following for several VMs.
Vagrant.configure("2") do |config| |
Conclusion
In this article is described a simple way to integrate Vangrant with libvirt for quickly spinning VM’s and running ansible playbooks on them.
This could be useful for testing ansible playbooks before shipping them to LIVE environments or testing purposes.
Also to quickly configure a more complex infrastructure, where you don’t want to use dockers.
On the next article i will write a step-by-step guide to spin up a Mesos Cluster using this approach, so this article could be used as prep-guide.
References
- https://libvirt.org/
- https://www.qemu.org/
- https://www.vagrantup.com/
- https://www.ansible.com/
- https://github.com/vagrant-libvirt/vagrant-libvirt
- https://app.vagrantup.com/boxes/search?provider=libvirt
- https://fedoramagazine.org/using-ansible-provision-vagrant-boxes/
- https://www.vagrantup.com/docs/multi-machine/